The Oral History Metadata Synchronizer (OHMS) has just released an exciting new feature; it is now capable of using a single interview with multiple languages. This means that in the OHMS viewer you will be able to see transcripts and indexing in the language of the interview and a translated language. This came just in time for us at OHLA because one of our faculty project leaders, Noriko Sugimori of Kalamazoo College, is working on bi-lingual oral history interviews about the experience of Japanese and Korean peoples during WWII. Sugimori’s first completed interview using the bi-lingual feature of OHMS can be found here. Currently, there is only one other bi-lingual OHMS interview created by The Haiti Memory Project, which you can listen to and read here.
Because this is a newly released feature, there is currently no official documentation on how to use the bi-lingual setting when creating projects in OHMS. If you are interested in using OHMS for bi-lingual transcription and indexing but do not know how to use this functionality, have no fear! It is a somewhat easy process and we will show you all of the steps below. (This tutorial assumes you have log-in credentials from the Louie B. Nunn Center to use the OHMS application, and that the OHMS viewer is installed on your server.)
Step 1: Create New Interview
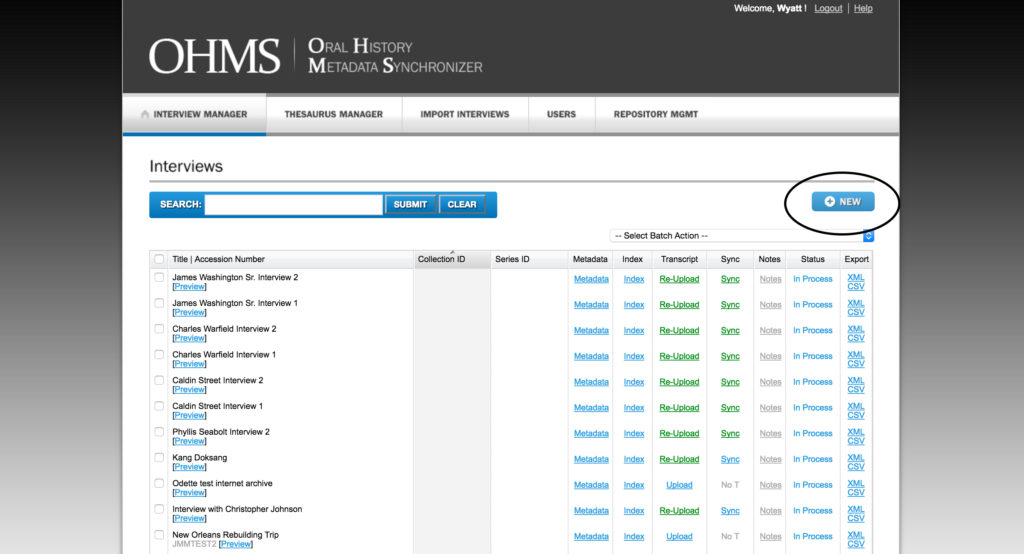
Log in to OHMS and create a new interview or edit an existing interview in the interview manager.
Step 2: Enable Multi-Language Functionality
Scroll down on the metadata page until you see the boxes that say “Language,” “Include Translation,” and “Language for Translation.” Under “Language” type in the language the interview was recorded in. Check the box for “Include Translation” and then type in the name of the desired language for translation in “Language For Translation.” This will enable the multi-language functionality for indexing and transcript synchronization. (It is important to note that OHMS will not translate your transcript; translation must be done manually.)
Step 3: Upload Transcripts
Transcripts in both languages must be formatted according to
OHMS guidelines (
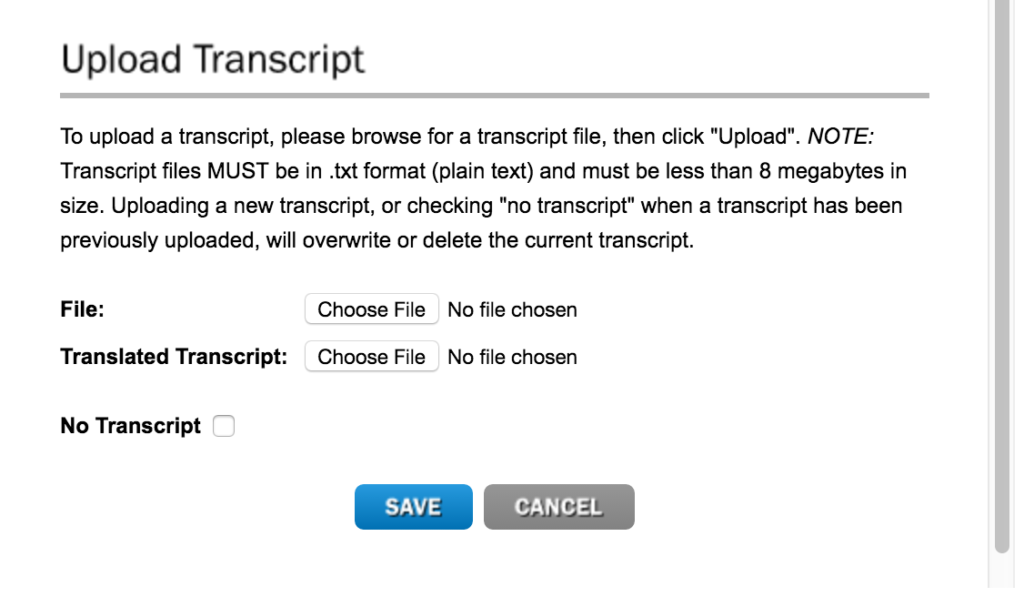
our tutorial with the macro may help). Then, navigate to the interview manager and click on the “Upload Transcription” button to upload transcripts. Upload transcripts for the original language and the translated language.
Step 4: Synchronize Transcripts
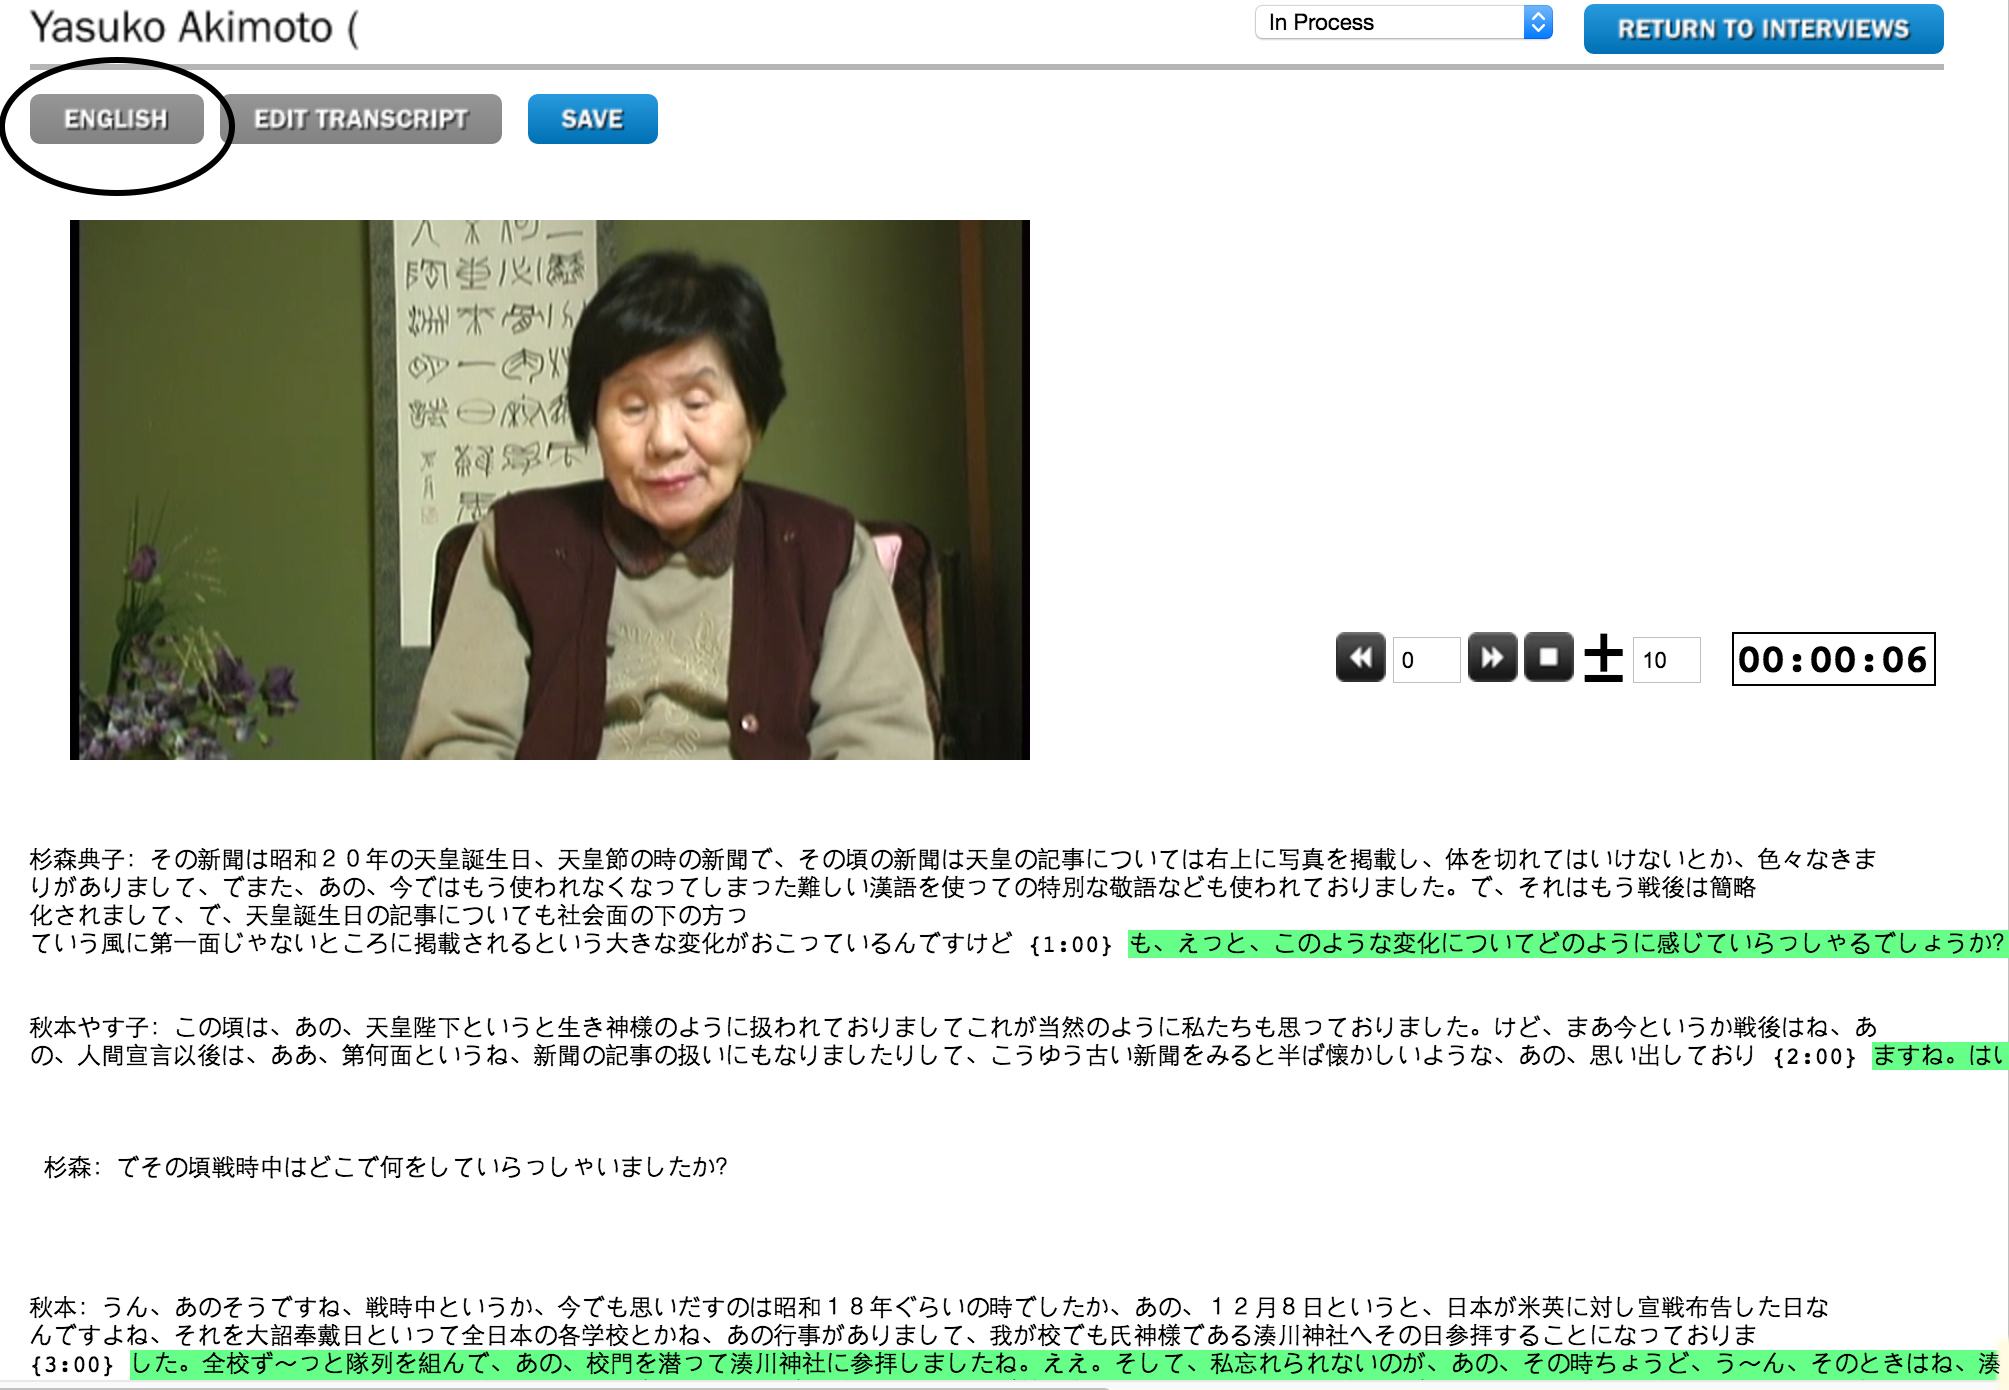
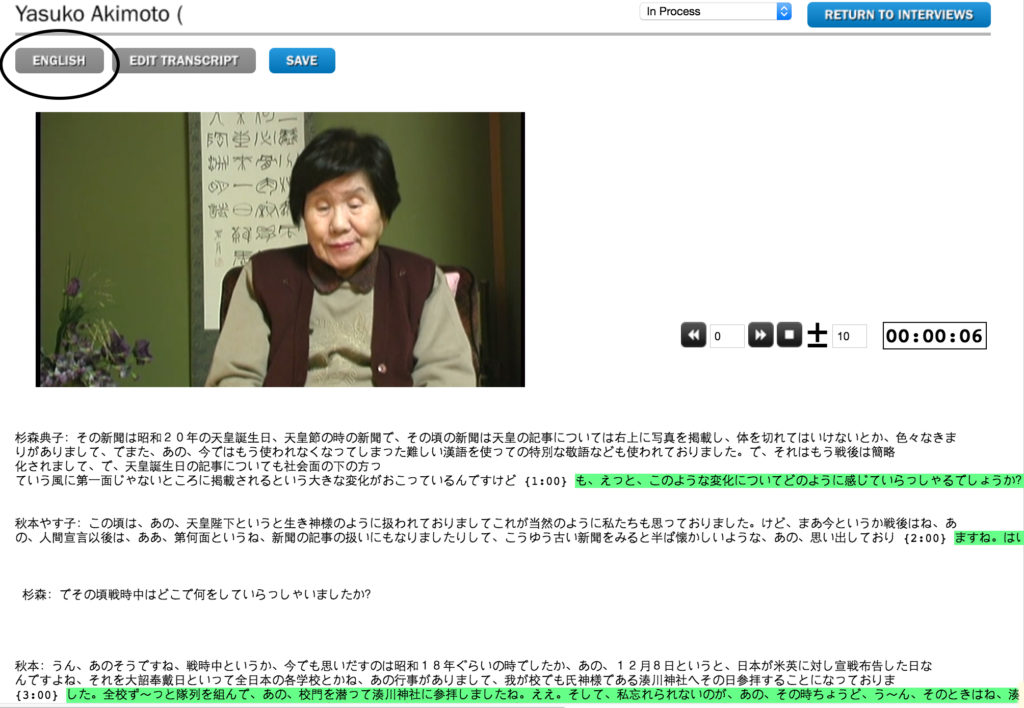
In the interview manager page click on the “Sync” button for the interview you are working with. You will be brought to the synchronization page. It should look the same as the normal sync page, except there will be a new button next to “edit transcript” that allows you to switch between languages for synchronization. You will need to Sync the interview twice: once for the original language and once for the translated language.
Step 5: Index Your Media
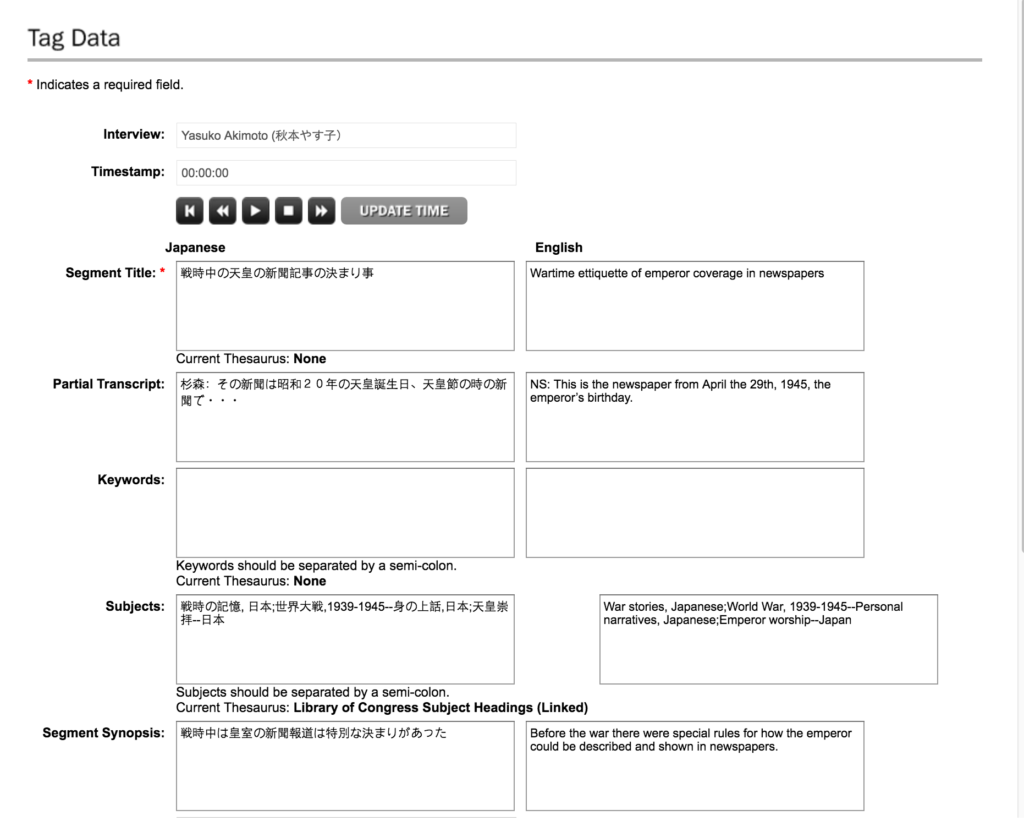
Click on the index button for your project in the Interview Manager page. Select a portion of the interview that you would like to index and you will be brought to the Tag Data page. As you can see, there are now two sections to fill out: one in the original language and one in the translated language. Fill in both sections in both languages. Do this for each section that you plan to index.
That’s it! After indexing, you will have created a multi-language interview in OHMS. In the OHMS viewer you will now be able to switch between languages in indexing and transcription. As you can see, it is a little more work than doing a project in one language because you must sync and index in two languages, but it is well worth the time. This new feature is exciting as it allows for greater accessibility to interviews that would otherwise be thwarted by language barriers.
