

OHMS indexing produces an invaluable, but sometimes dull result. Hyperlinks can be a great way to add an additional element to an interview index, and create a fuller, more interactive project. Follow the steps below to properly link media in the OHMS viewer.
Begin by navigating to the indexing page of a project in the OHMS viewer.
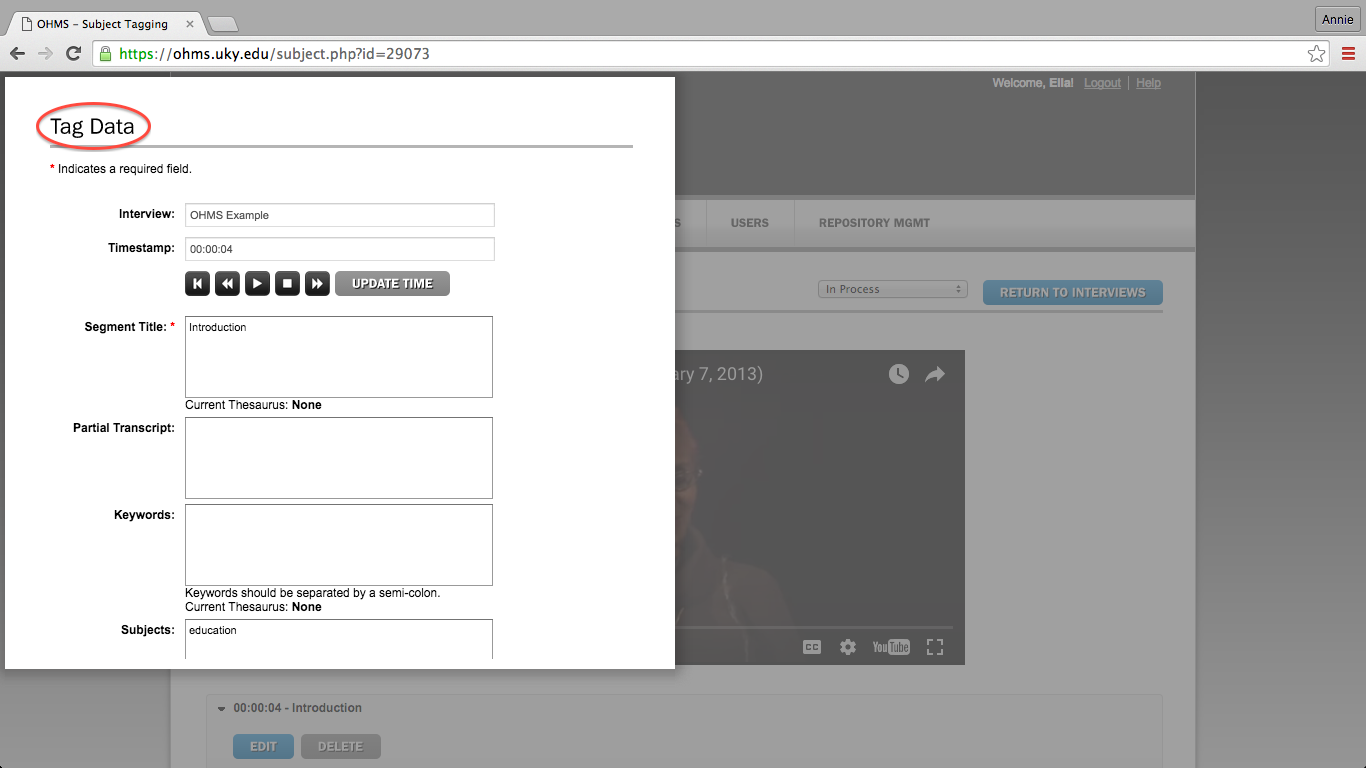
For this tutorial, I am using an example project from the OHMS viewer.
In a separate window, navigate to the dashboard of your media hosting website.
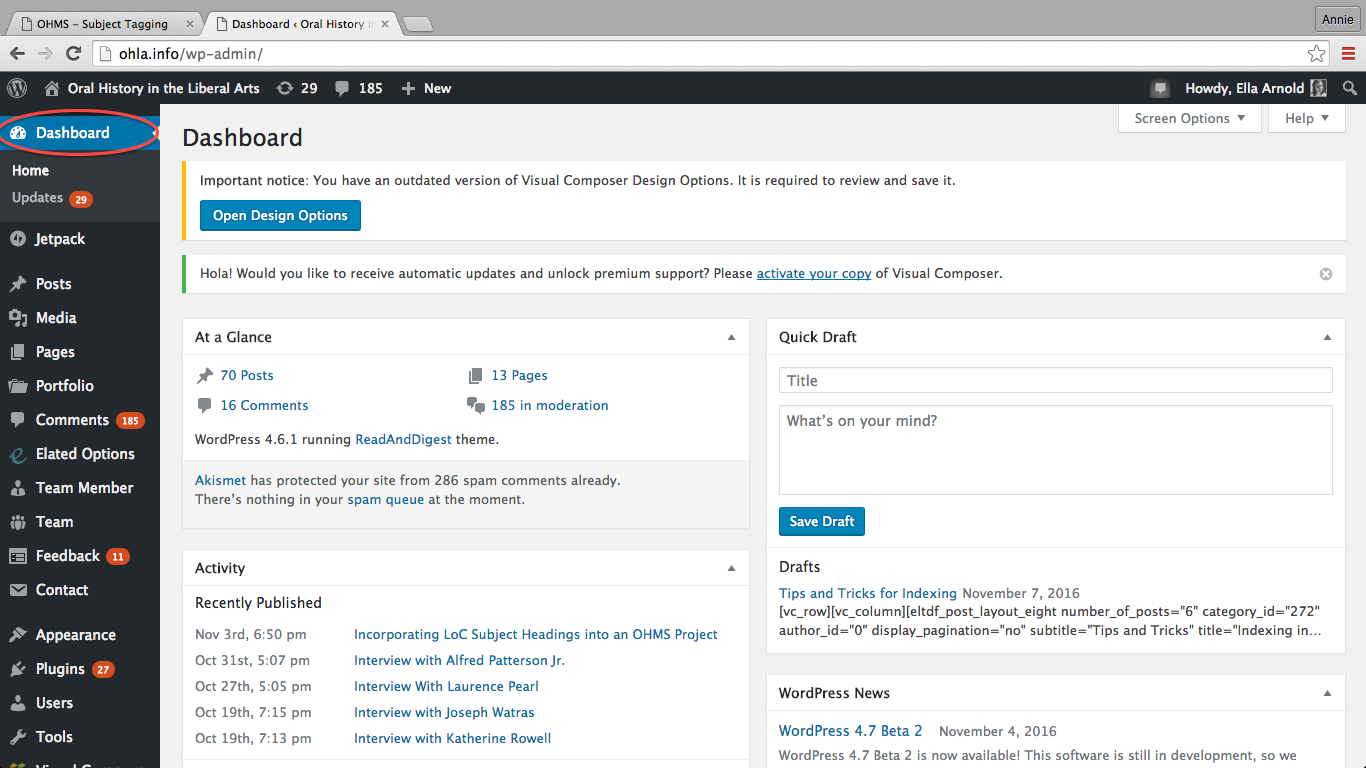
This post will use OHLA’s WordPress website to link media, but the process should be the same for any WordPress website.
Go to the media library, and click "Add New."
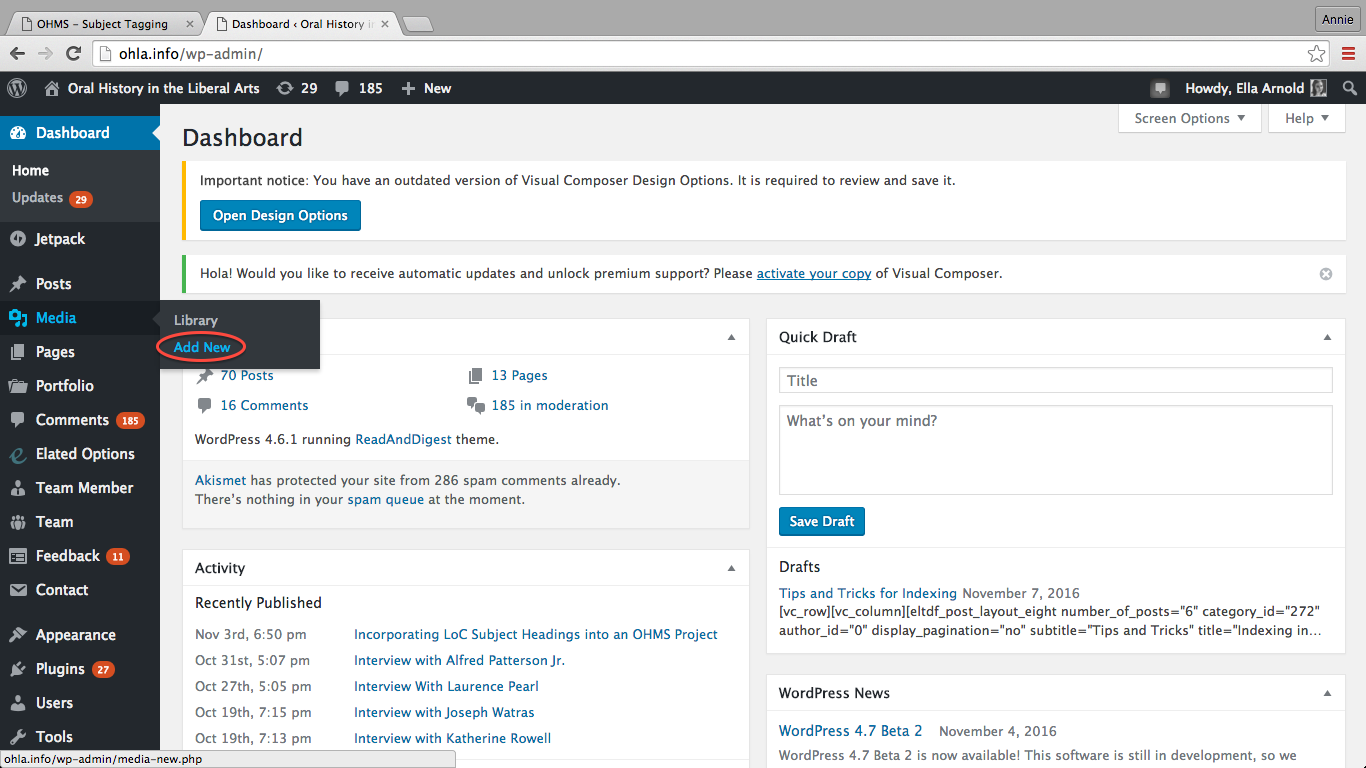
You will upload media to your host site here.
Click "Select Files."
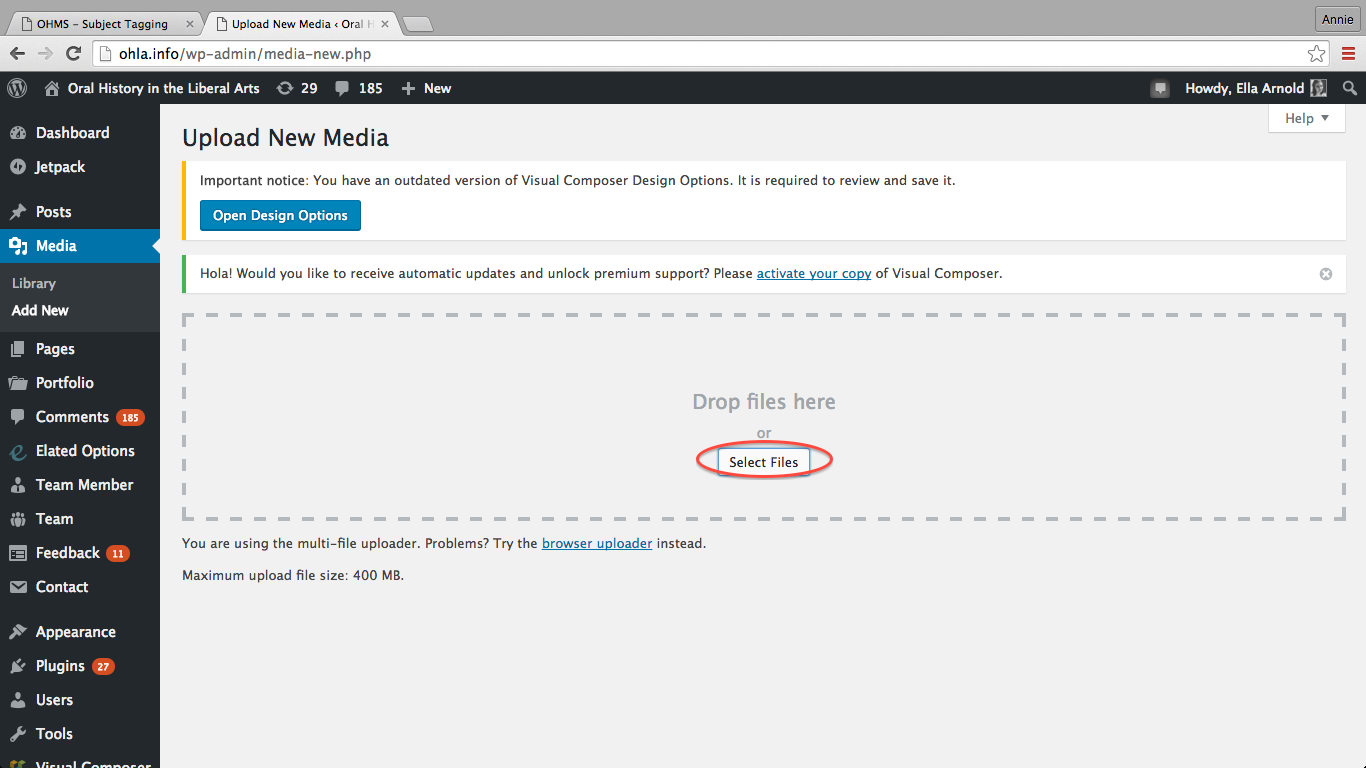
This is what the “Add New” page should look like.
Select a file from your computer to upload to the media library
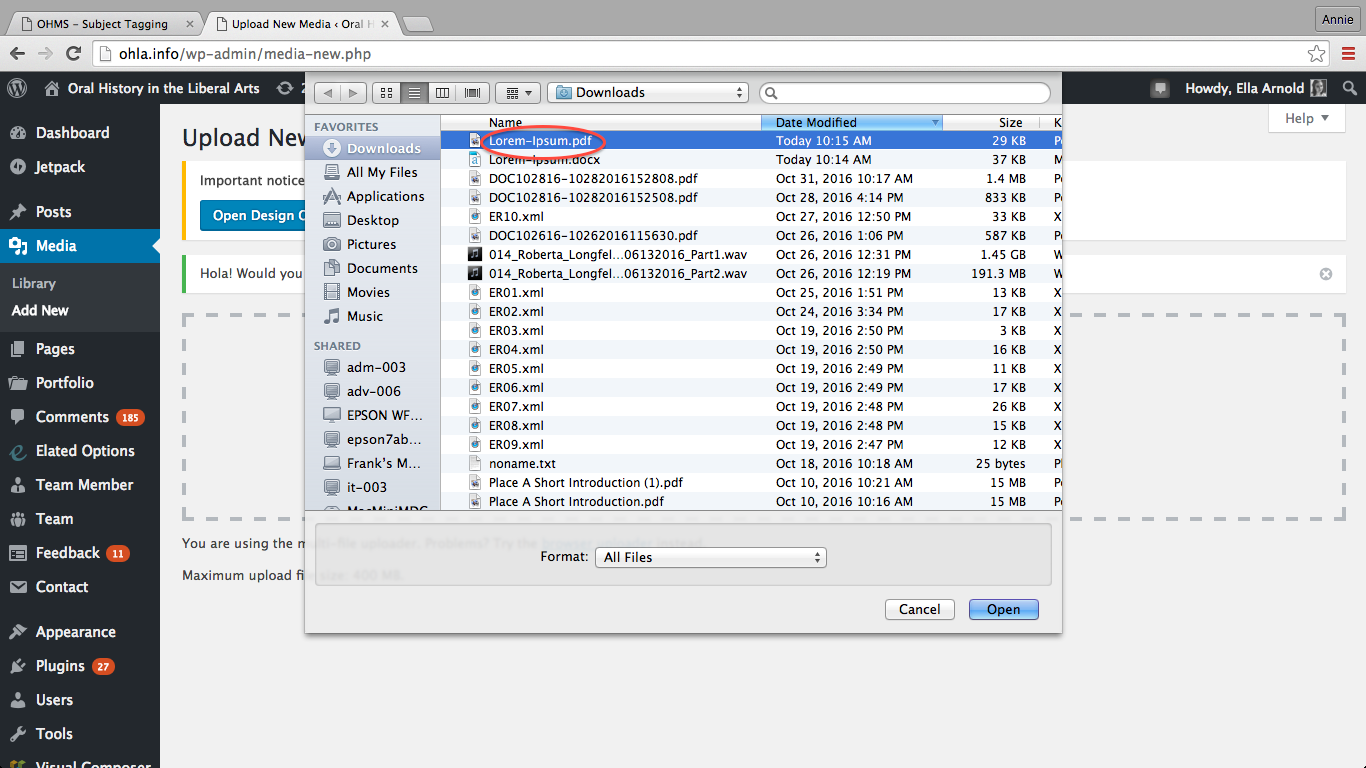
Select a file with an extension such as JPEG, PDF, or PNG. This will allow you to link directly to an online view of your selected media.
After doing this, the file should appear below the "Select Files" field.

For this tutorial, I uploaded a PDF document.
Once you have uploaded the media, return to the media library.

Here, you will be able to view all of your media, including the file you have just uploaded.
Double-click on the media file you've uploaded.
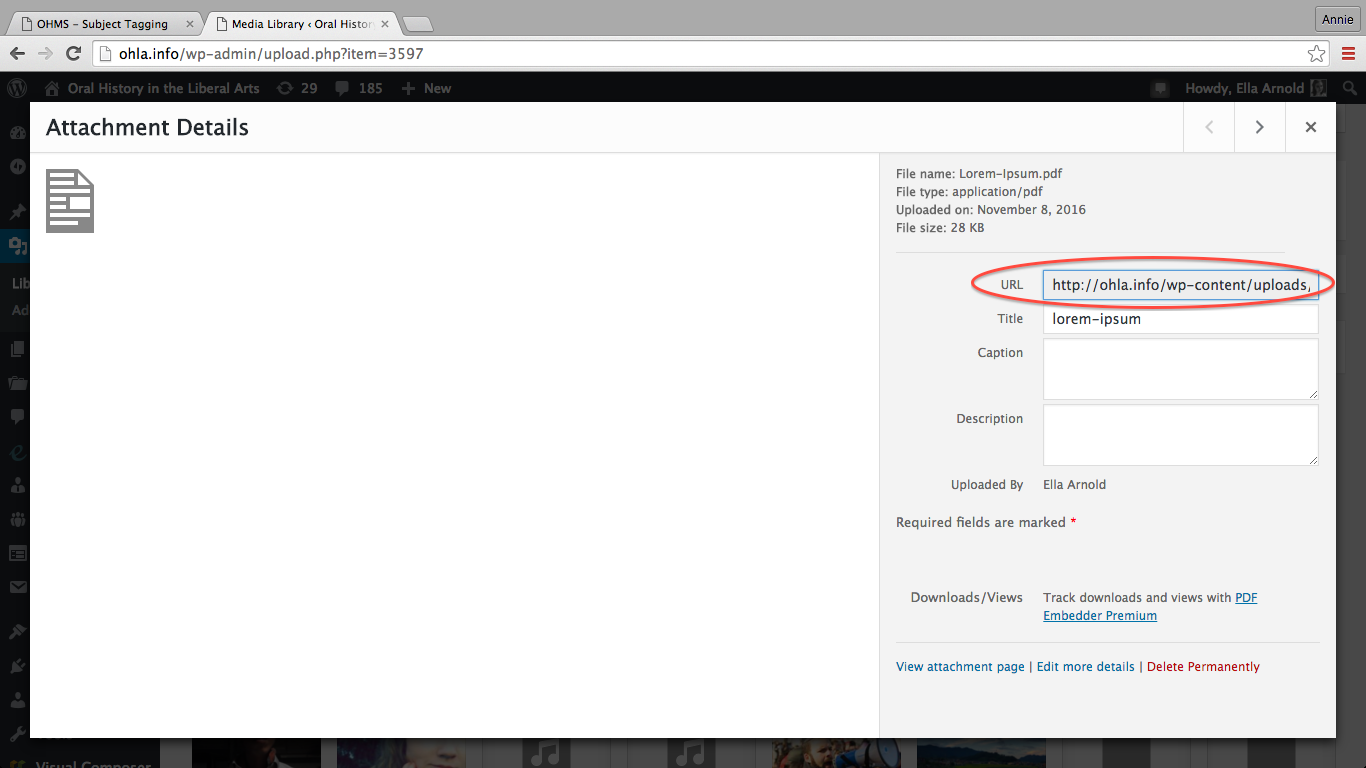
By double-clicking, you will be able to view the file information.
You will see the URL of your media in the right-hand column. Select and copy it.
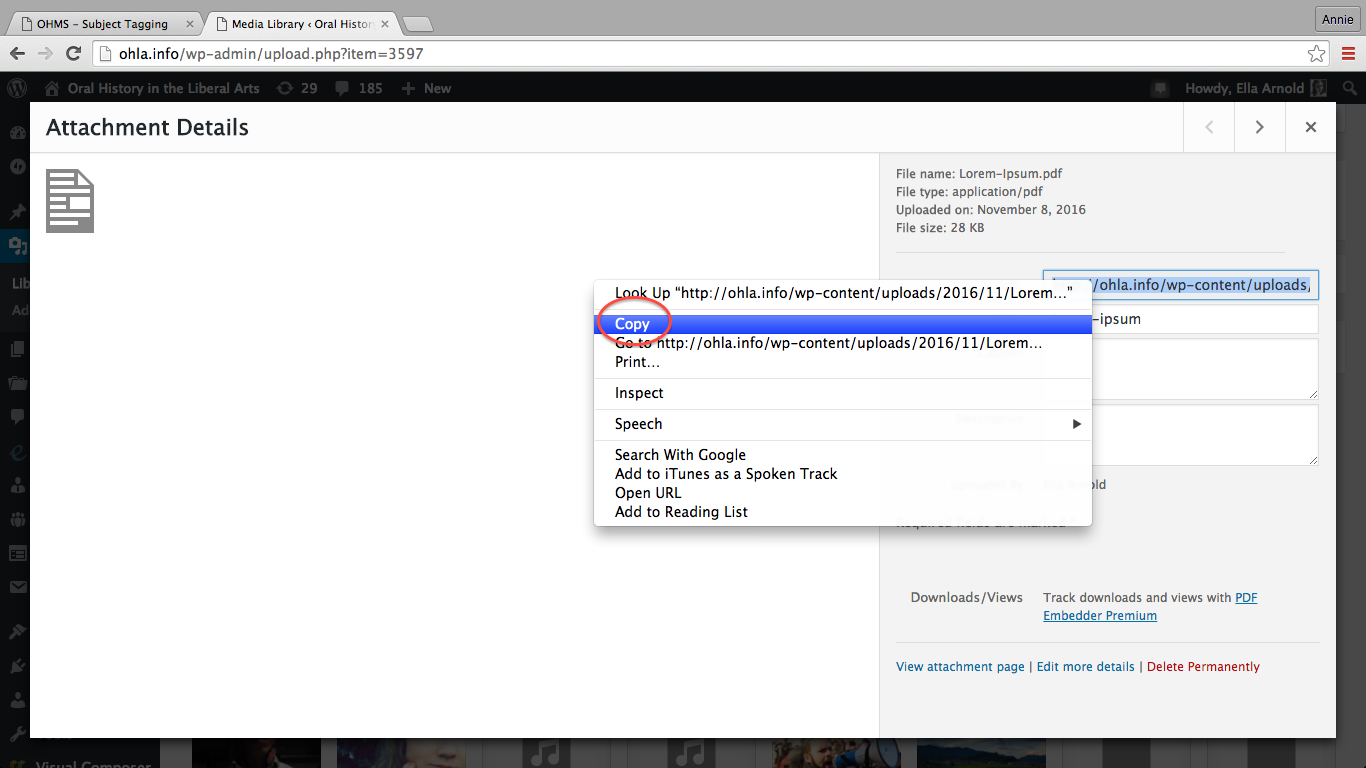
To copy the URL, select the text, right-click, and select “copy.” Alternatively, select the text and type CTRL+C for PC or Command+C for Mac.
Next, return to the indexing page of your project in OHMS.

Navigate to the “Hyperlink” field.
Paste the URL into the "Hyperlink" field.
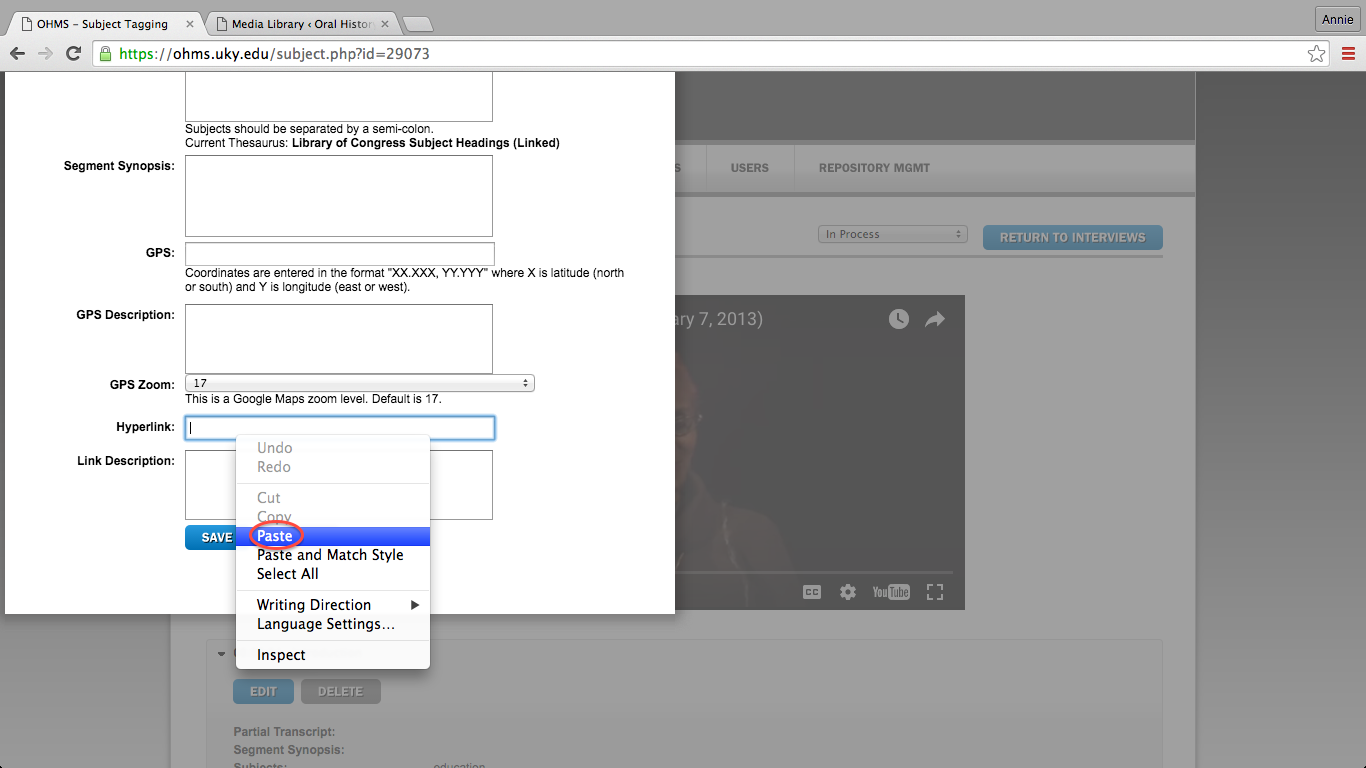
To paste, right-click in the field and select “Paste.” Alternatively, while in the field, type CTRL+V for PC or Command+V for Mac.
Move down to the "Link Description" field, and insert a brief description or title for your media.
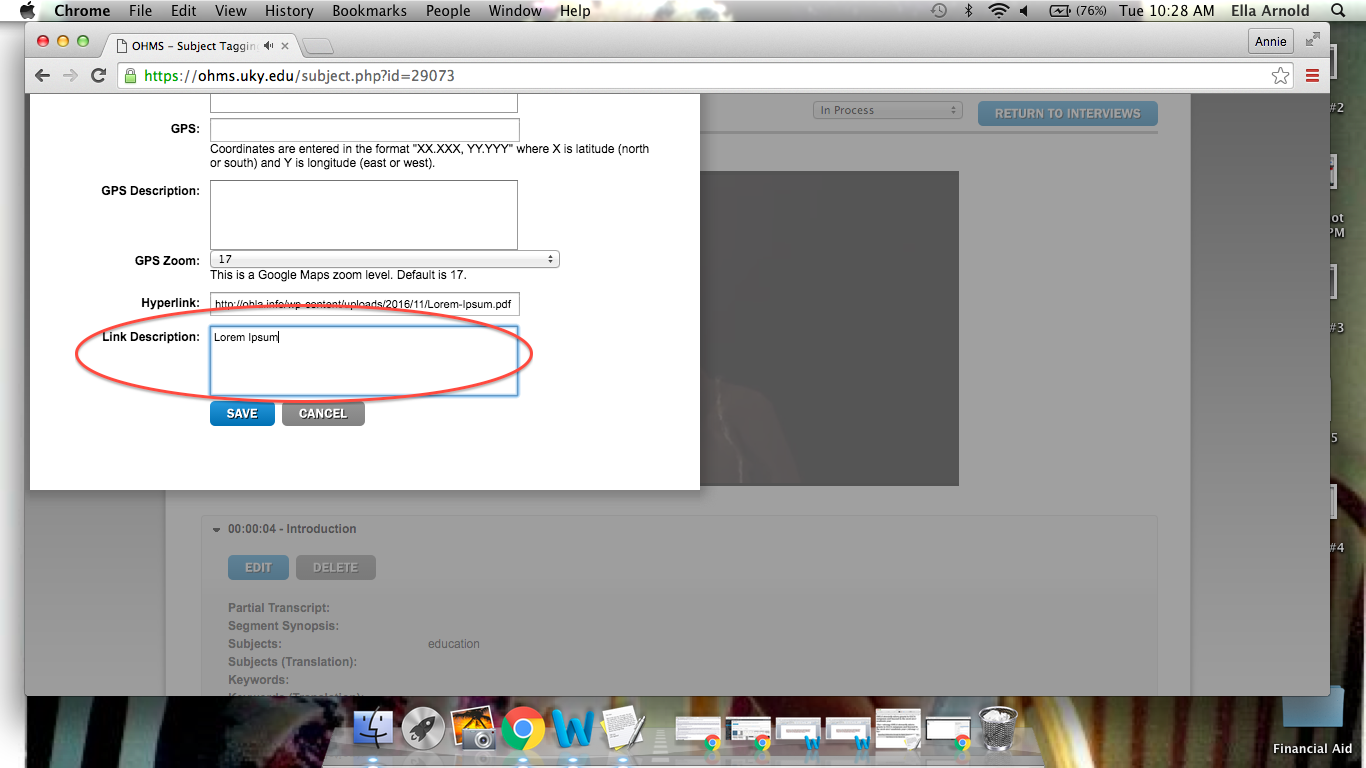
This is the text that will appear in your project index to include the hyperlink. A viewer will click on this text to view the media.
Save the index tag. This is what the final index will look like with the hyperlink.
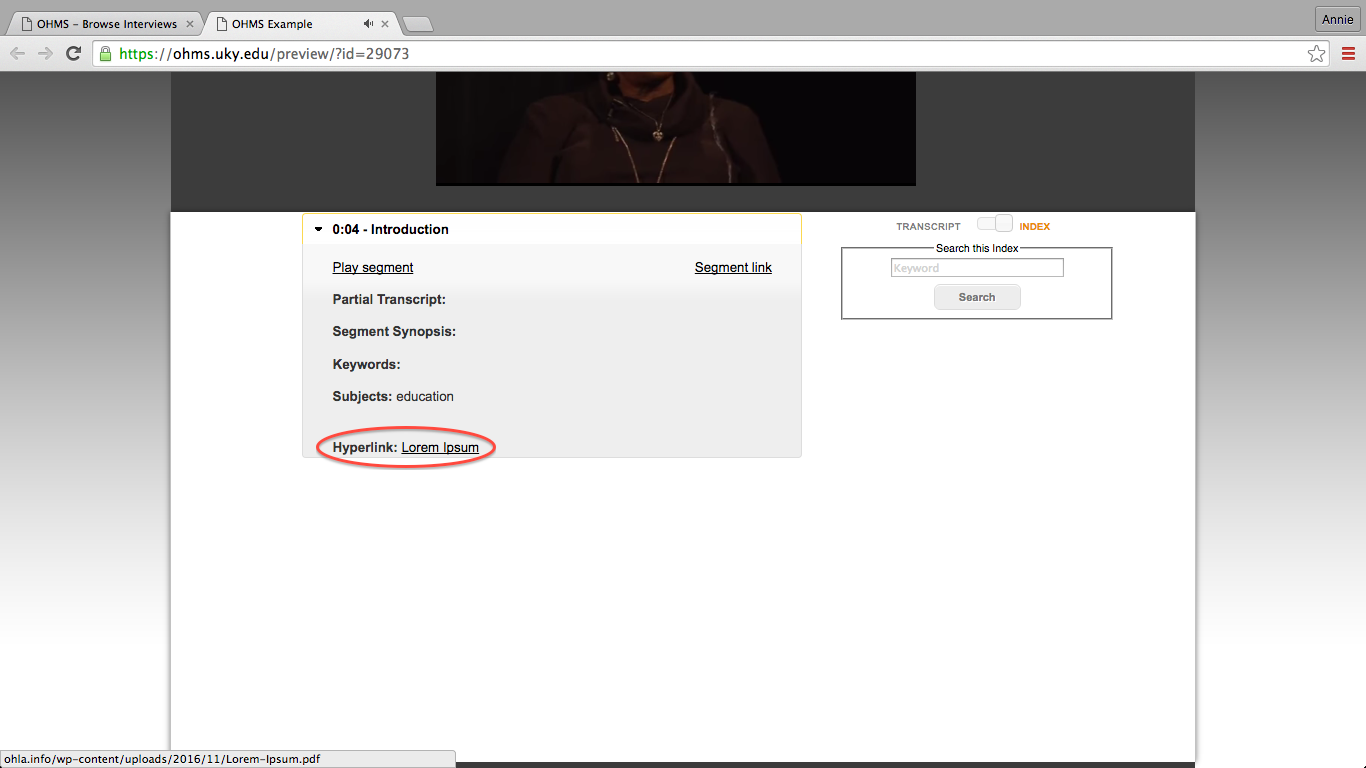
To view the media, a viewer will need to click on the text, “Lorem Ipsum” in this case, to navigate to the link.
To view the link, click on the underlined text in the "Hyperlink" section. The window with the media URL should appear.
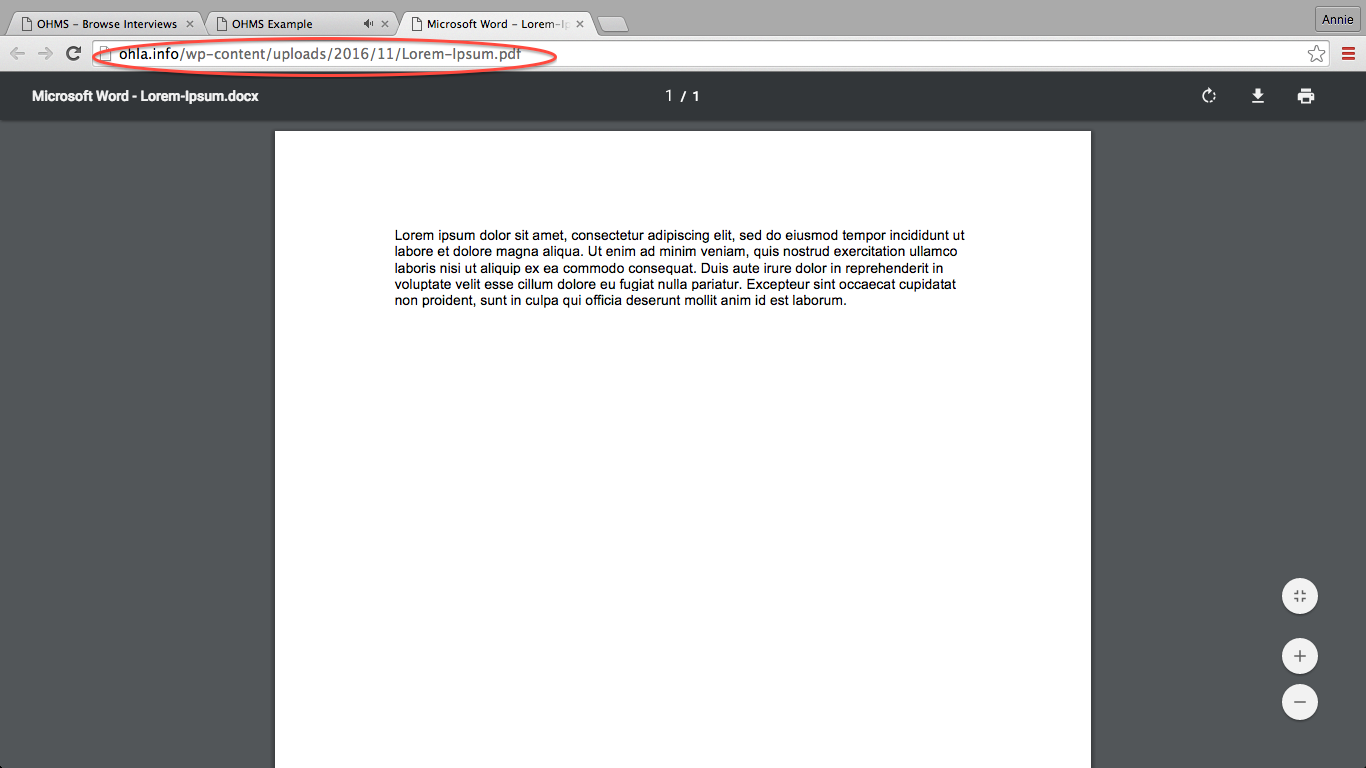
This is the window that appears with the media content. For this example, I linked to a PDF file.
By following these steps, you should be able to add hyperlinks to your OHMS interview index with media from a WordPress website. Best of luck!