So you want to put an interview in OHMS, which means you need to describe it. If you’re new to OHMS, how you do that may seem a little confusing at first.
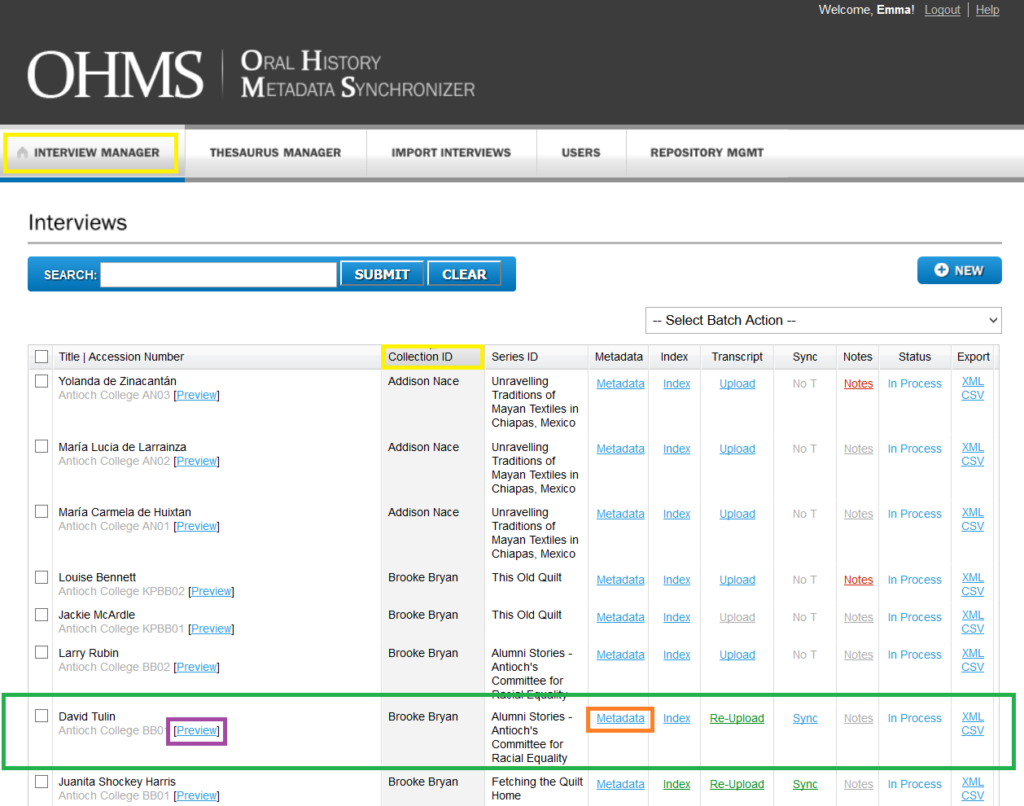
When you log into OHMS you’ll see the Interview Manager, the page that lists all of the interviews currently in your OHMS repository. It is organized alphabetically by Collection ID, outlined below in Yellow.
We’ll use Brooke Bryans interview of David Tulin that is in Green as our example, and we’ll cover how to enter information in the Metadata Editor link in Orange and then later viewing the interview with the Preview option in Purple.
To create a new interview, simply click the New button in the top right corner. This takes you directly to the Metadata Editor, which is where you enter the descriptive information about the interview.
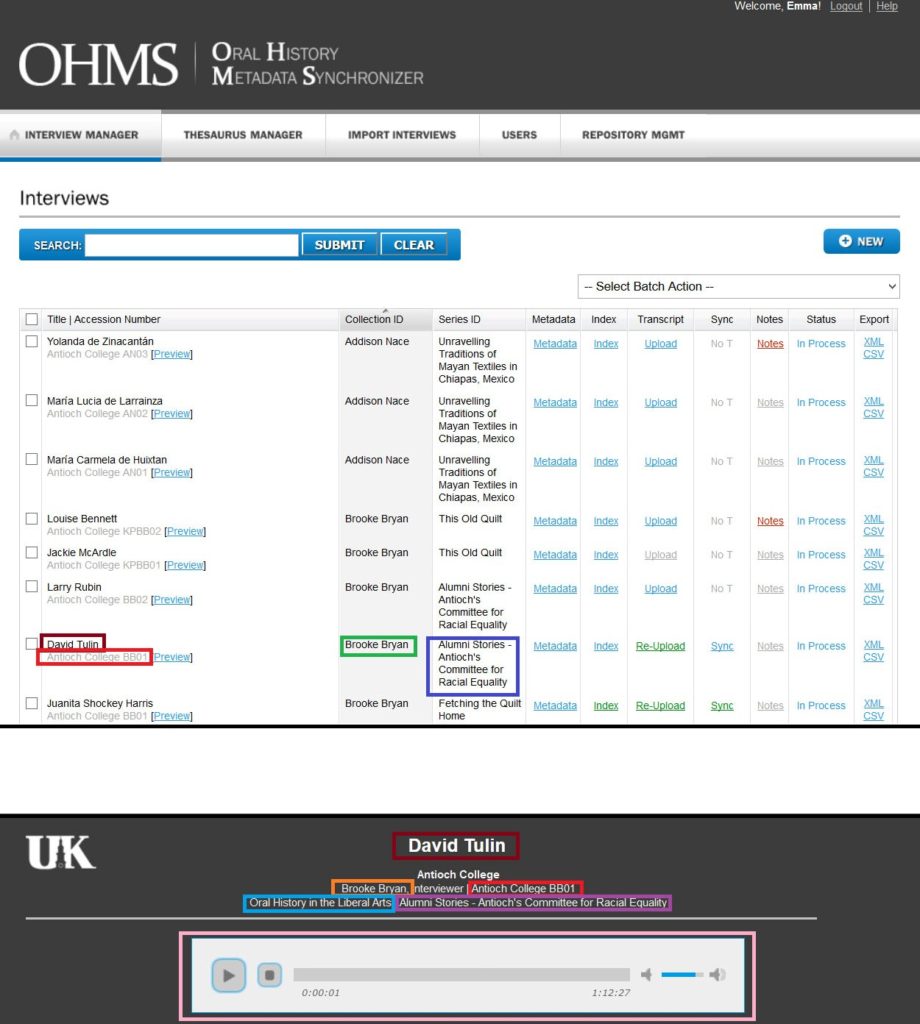
As you can see this interview has all of the information needed to tell who was interviewed, who interviewed them, the ID of the interview, that the interview is part of OHLA, and the name of the series the interview is from.
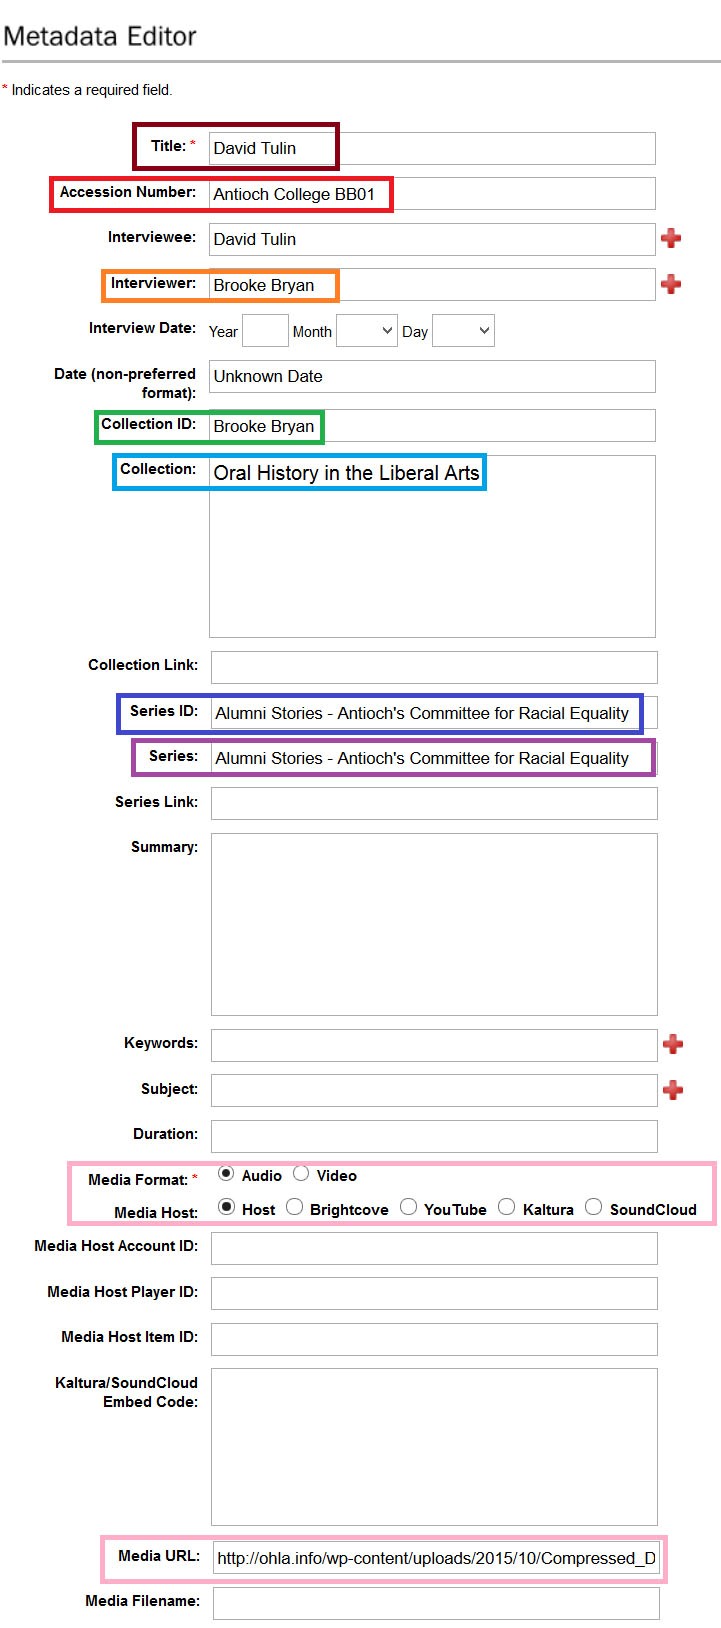
For OHLA projects, you’ll want to fill out the following fields as described.
Title: Name of person interviewed.
Accession Number: This should be the affiliated school name, followed by the initials of the interviewer and the interview number, padded out to two digits.
Example: David Tulin’s interview is Antioch College BB01. The affiliated school is Antioch College, Brooke Bryan is the interviewer, and it is the first interview in this collection.
Interviewee Name: same as Title.
Interviewer Name: Name of person who conducted the interview.
Interview Date: The date the interview took place.
Collection ID: Make this the Interviewer’s Name.
Collection: Should be Oral History in the Liberal Arts if you are part of the OHLA project.
Series ID: Name of the project this interview falls under.
Series: Same as Series ID, group of interviews this interview is part of.
Series Link: URL for your project homepage.
Media URL: The URL for the audio or video interview file.
Media Format: Click Audio or Video.
Media Host: The streaming service on which your interview file is stored. Selected “Host” if your file is stored on something other than the options listed. Note: For YouTube enter ONLY the end of the URL after the = sign, otherwise your video will not display.
Be sure to fill out both Media Format & Media Host or OHMS will not display!
OHMS is particular about how things are entered, so if you run into a problem, go back and check what you’ve entered. Make sure all of the characters are in the English alphabet; OHMS can’t read characters from other alphabets.
Once you’ve added your metadata, it, which will take you back to the Interview Manager. Now you can see where the metadata you’ve entered appears here:
Now, you can also click on the Preview link, which will take you to a screen where you can see your interview as it will appear once you publish it:
Anyone watching this interview will now have all of the contextual information: who was interviewed, who interviewed them, the ID information, that this project is part of OHLA, and the name of the project itself.
Hopefully this guide was helpful for entering your interview metadata into OHMS. Keep on interviewing!
Downloadable Word Doc version here: OHMS Metadata Entry
