
Does your oral history project chart a sequence of events or a local chronology that takes place in a regional or hyperlocal place? The Knight Lab at Northwestern University offers a tool that can merge maps, videos, texts, and images into a compelling digital story. This mapping tool is particularly useful for telling a story that happens over time, through a series of events taking place in a regional setting.
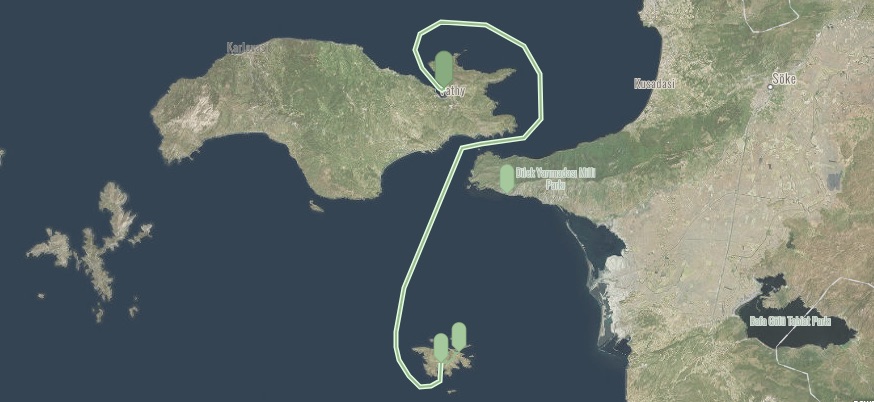
StoryMap is one of the more complicated tools that The Knight Lab produces, but it is still just as user-friendly as SoundCite and TimelineJS. StoryMap lets you make what is essentially a PowerPoint but instead of moving from slide to slide, the visual moves from place to place, with little headlines and descriptions for each place you choose.
Getting Started
To start, go to storymap.knightlab.com and select the big green “Make a StoryMap” button. You’ll be asked to name your StoryMap at this point, but the name can also be changed at any time by clicking the “My Maps” button at the upper left corner of the page, selecting the gear-shaped icon next to your map, and clicking “Rename”. It will then show you a large world map, a sidebar with one slide on it, and various buttons and boxes along the top and bottom. Let’s go through them one by one.
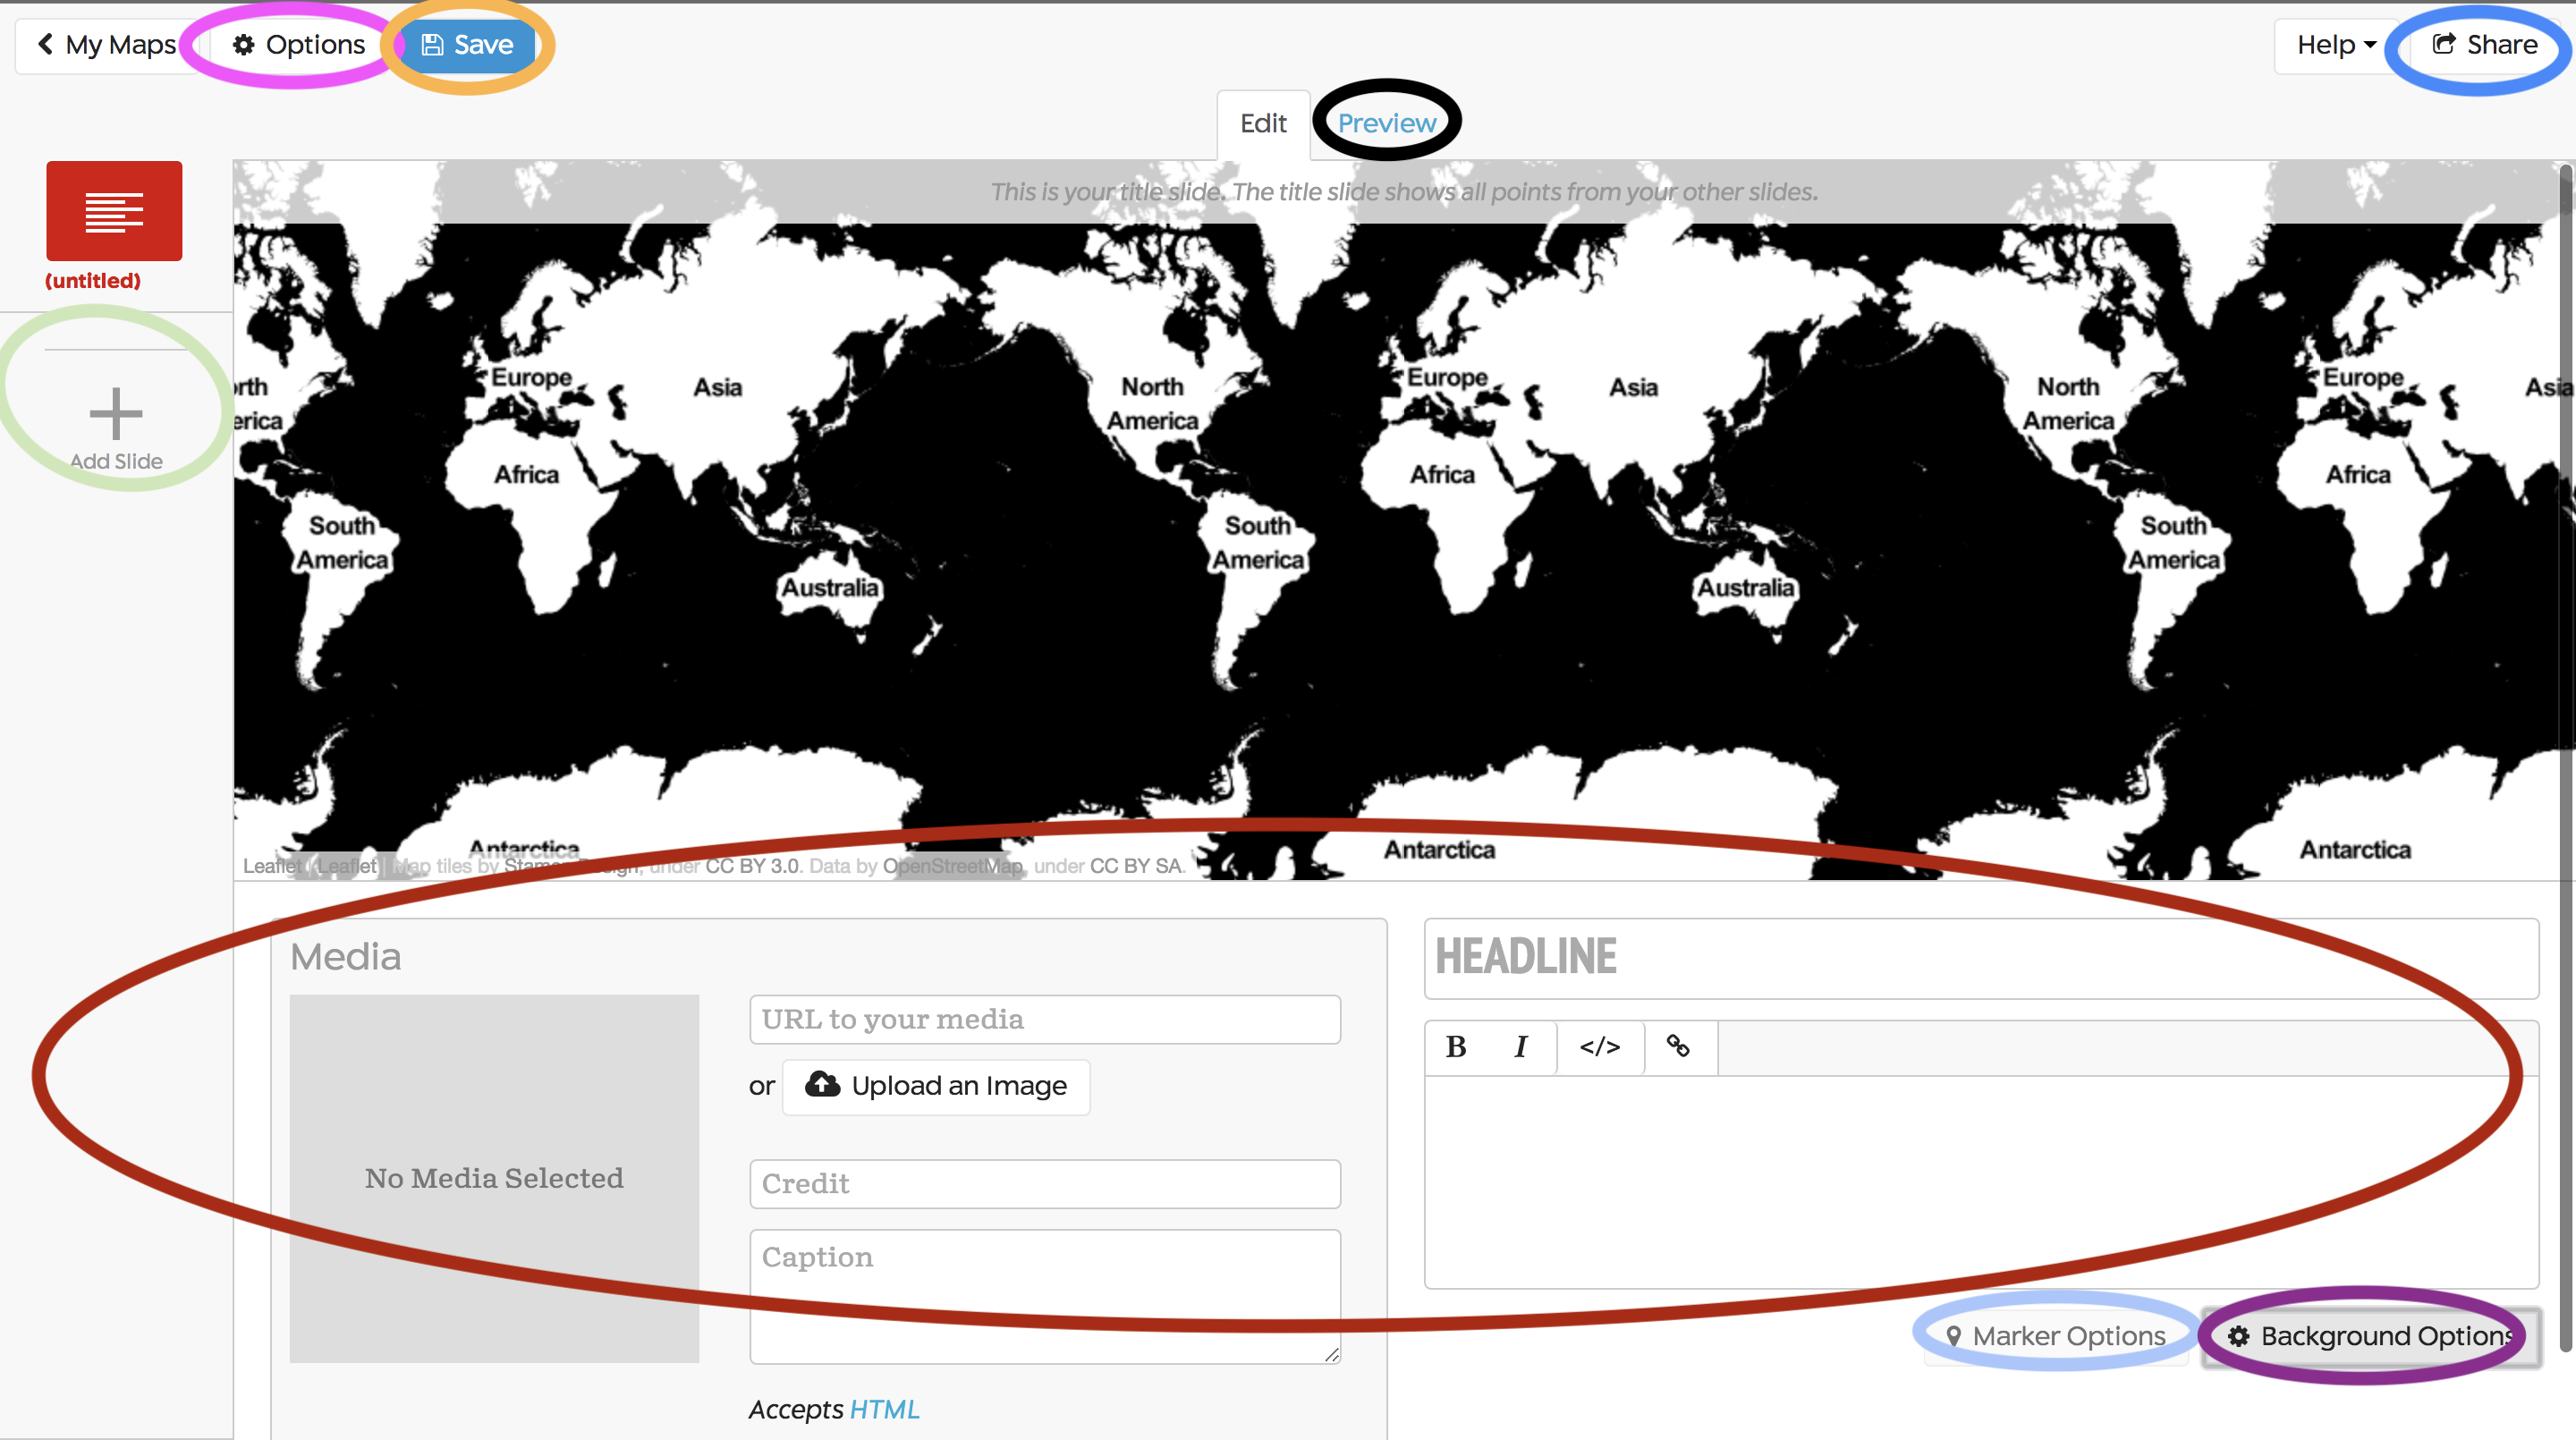
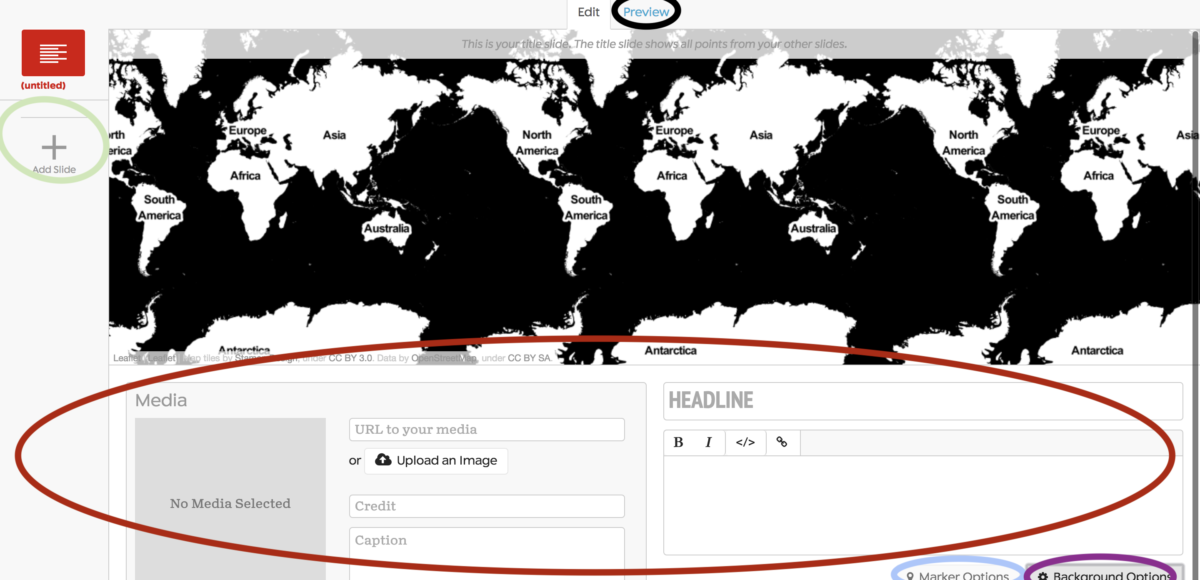
I know this picture looks complicated, but I’m going to try to make it as easy as possible.
Options/Save
Starting at the top left, you have an “Options” button (circled in pink) and a “Save” button (circled in orange). The “Options” button lets you change the fonts, the map style, and a “Call to Action”. The “Call to Action” function will let you add a button to the title slide of your StoryMap that leads the readers into the map. The default text for the Call to Action is “Start Exploring”, but you can change this to whatever you want. The “Save” button lets you save your StoryMap so you don’t have to have the StoryMap tab open at all times.
Share/Help
Staying along the top, on the top right we have a “Share” button (circled in blue) and a “Help” button. The “Help” button will give you some options if you get stuck, such as a forum for questions and a repository for the code of the program. The “Share” button is where you will get the link to your StoryMap to share it as well as the embed code to embed it into a website.
Preview
Moving down, there is a “Preview” tab (circled in black) that will let you preview the StoryMap as you go along and give you an idea of how it will look to a reader.
Slide Bar
Next, on the far left, we have our slide bar. If you’ve used presentation programs such as Keynote, PowerPoint, Google Slides, or Prezi, this should be fairly familiar to you. The first slide (the red block labeled “untitled” in the photo) is your title slide, which I will show you how to edit in a second. The “Add Slide” button (circled in light green) is fairly self-explanatory and lets you add a new slide with a few functions.
Editing Box
The entire bottom of the page is taken up by an editing box (circled in dark red). Unlike programs such as Prezi, PowerPoint, and Google Slides where you edit the slide in the slide itself, StoryMap has a different box entirely for this, and it’s clear why. StoryMap is like Prezi on steroids, in my opinion, with much more options to edit and create slides over your map. Therefore they created an entirely new editing panel instead of having all of these options cramped into the slide itself. In the editing panel at the bottom, you can upload an image from your desktop or paste the link to a picture from Flickr or other image sharing sites (just like in our TimelineJS tutorial, if you choose to do this make sure the image is publically shareable) and it lets you add a caption to the image. This link bar also lets you insert videos that will be viewable to the reader, so inserting a YouTube link into the box works as well. To the right is where you will put your headline and description of the place you choose to mark on the map.
Marker Options/Background Options
Towards the bottom right, we have a “Marker Options” button (circled in light blue) and a “Background Options” button (circled in purple). The “Marker Options” will be unavailable until you add a new slide, as the first slide is your title slide and you cannot set a marker on the map for your title slide. When you do create a new slide, the “Marker Options” button lets you create an image marker or a different style of marker on the map than the default one created by StoryMap. The “Background Options” button can be somewhat confusing as it is not for the background of the entire StoryMap, but rather the background of the slide itself. We’ll get into this in a minute.
That was a lot, I know, but stay with me, here.
Creating a New Slide and Using Marker and Background Options
When you click the “New Slide” button you will see a marker that looks like a quote bubble appear on the map as well as a search bar at the bottom of the map. The search bar is like a Google Maps search bar, allowing you to search for names of places or specific addresses to put your marker. Now is where the “Background Options” comes into play. “Background Options” lets you change the color of the slide or make it an image. The default setting is translucent, but you can change it to whatever color you like by clicking “Background Options” and then clicking on the “Background Color” box. Regardless of the color you pick, the slide will be slightly translucent as to show the map underneath. If you would like to make the background of the slide an image, the options are the same as adding an image to the slide itself. You can select to upload an image from your desktop or paste a link to the image into the box. If you change the color of the slide and nothing happens, this is because it is only viewable by clicking the “Preview” tab (circled in black in the picture above).
That’s it! Truly, that’s it. You are now on your way to creating a beautiful StoryMap. This might seem like a lot to process, but I promise once you get going you’ll get the hang of it really quickly. StoryMap is created by The Knight Lab at Northwestern University, feel free to check out some of the other amazing Knight Lab programs here. Here are also two links to StoryMap projects, this one is about the Green Line metro route in Minnesota and this one follows transfers in football (soccer for Americans).