

Hey all! In creating project homepages for different OHLA funded people it became clear that a) everyone has their own different way of creating a homepage and b) not everyone knew where to start when creating one. I figured it would be a good idea to create a few little internal how-tos as part of my last push with OHLA, and this is the first one.
The first time you look at a project homepage in the back end can be overwhelming, to say the least. There is code and hyperlinks everywhere and I know when I first tried to dissect it it gave my a headache, but we’re going to walk through this step by step.
We’re going to focus on the top and bottom of the page. At the top of the page should be this code:
This creates a column on the left with a big margin on the right for another column which we’ll get to in a second. Below that code, paste this:
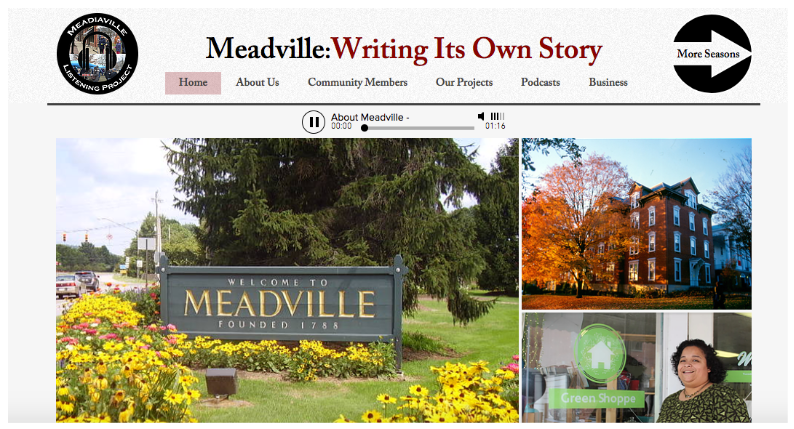
About the Project
This is just a simple heading for the project homepage. Below this, you should paste the project description. That’s it for the first section of this! Now onto the bottom. After the project description, paste this code and links:
Note: DO NOT KEEP THESE LINKS. These are links to another students interviews, I only kept the hyperlinks to show you that they should be linked. Once you publish the interviews (check out our other tutorial on that) past the links into the hyperlink section of the text above. Also, name the interviews “First Name Last Name Interview”. So, if I interviewed my best friend from home, I would put “Chris Levins Interview” where the “Interview One” text is now. Then I would paste the link to that interview in the hyperlink section of the text. If you don’t have interviews uploaded yet you can keep these links as long as you change them before you publish the page. Also, if you don’t have interviews uploaded yet, this is where you can stop for now. Once you get interviews uploaded to WordPress, be sure to read on.
This is where it gets tricky. Paste this code:
Listen to the Interviews

This creates a section at the bottom of the page that you can access through the visual editor. Go up to the top of the page and click the button that says “Backend Editor” right under the title. You are now in the Visual Composer mode. Hover over the part at the bottom of the page that says “Elated Post Layout 6” and click the pencil logo in the green editing bar that pops up. Scroll down to the “Category” drop-down menu. This is where you have to pray you did our interview upload tutorial correctly, as this can take some finagling. Click the drop-down menu and find your project category whether that be under Facult Projects or Student Projects. What this does is pull little visual links to your interviews as long as they’re housed in that category. If you did the interview tutorial correctly, this should be easy.
Alright, that’s almost it, just a few more things.
At the top of the page make sure the title is correct and has proper capitalization.
On the far right-hand side of the page editor, scroll down to see another “Category” menu. Find the category you created earlier for the interviews and click on that to file your project under that category. Scroll down a little further to see the “Featured Image” button. This is where you will select a header image. Be careful with this, as you’ll need to preview the page before publishing to make sure it looks okay with white text over it.
Lastly, if you are making this project homepage but are not the person that is doing the project, SAVE THE DRAFT and then click “All Posts” under the “Posts” tab at the top left of the WordPress page. Find the project page, click “Quick Edit” and change the author in the drop-down menu to the person whos project the interview is attached to.
After all this is done, you’re all set and ready to publish!